Notification webhook
Overview
After the app is installed, it will automatically ask Shopify to send the order information to the app when a customer made an order, the order information Shopify sent to the app contains all data related to the order e.g line items, fulfillment, and customer data etc, then the app will use the order information and the entries and rules you created in the app admin to send customer either activation code or the file download link
But from 1st July 2023, Shopify will not send information that can identify the customer by default (information like customer names, email, and address, etc), access to protected customer data will require approval from Shopify
To be able to get the order's customer email is important for the app to be able to send the activation/file download email to the customer, we have already submitted an application for protected customer data access. However, the approval process may take some time, and we are uncertain when it will be granted.
To ensure the uninterrupted operation of our app and the successful delivery of customer activation codes and file downloads. The Shopify notification webhook can be used as an alternative way to make the app work while the app is waiting for approval to access the customer data like email (because notification webhook will be able to send the whole customer data like email to the app's webhook endpoint)using.
Setup steps
There are three steps to use the notification webhook
Get the webhook url from the app
Create notification webhook and signature in Shopify admin
Save the webhook signature in the app
Step 1 - Get the webhook url from the app
Go to Shopify admin > Apps > Digital Asset manager > Settings > Notification Webhooks to trigger delivery > Incoming webhook url > copy

The webhook url is the url Shopify will call when a event (e.g order paid) occurred
Step 2 - Create notification webhook and get signature
Follow the following steps
Go to the "Settings" section and click on "Notifications."
Scroll down to the "Webhooks" section and click on "Create webhook."
In the "Event" field, select "Order paid" or "Order created" (depending on your preference).
Select JSON as the format
Enter the above incoming webhook url as the "Endpoint URL"
Save your webhook configuration.

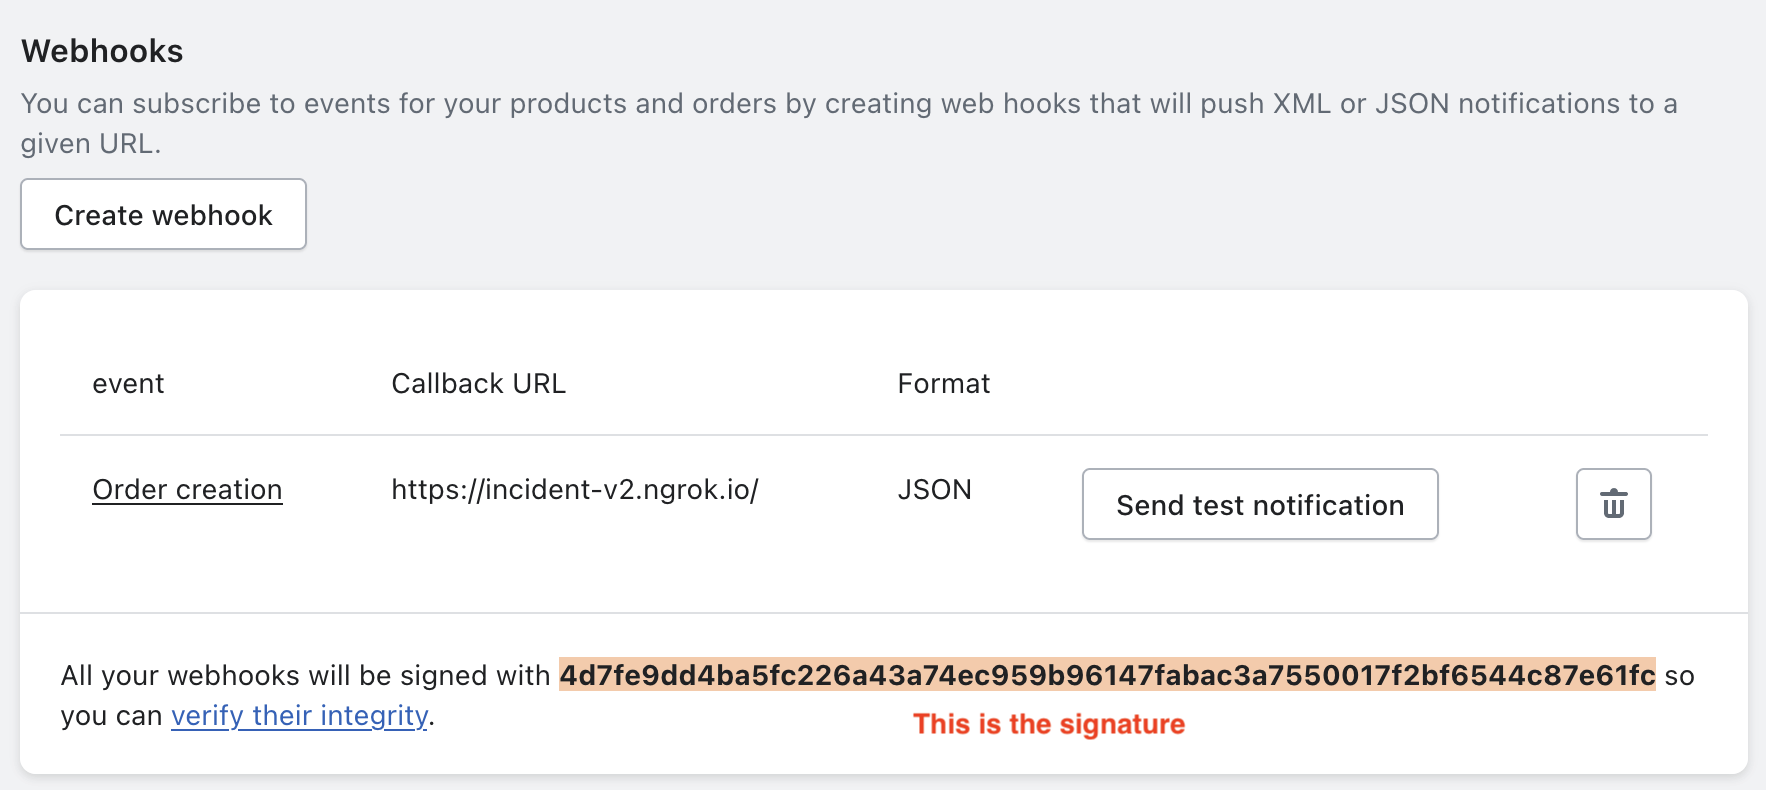
Once the webhook is created, you will the signature at the bottom

Copy the signature (the signature is for the app to verify the webhook is legit and coming from Shopify - on every signle webhook call, shopify will call the url with the signature, then the app will verify the call is legit before processing it)
Step 3 - Save the webhook signature
With the signature copied in the clipboard, go back to the App admin > Settings > Notification Webhooks to trigger delivery and paste in the signature in the signature box > Scroll up and Save the setting

Testing
Once all of the above steps are done, please take the following steps to test it
Set up a new entry with the products in the app
Create a new order in Shopify admin
Make changes to the order, so it will trigger the webhook event you added
Check if the order's customer receive the delivery
Let us know if you encounter any issues or have any questions
Last updated